Need to evenly distribute tasks, form submissions, or emails across your team using Power Automate? Round-robin allocation is the answer, and I’ve got two straightforward approaches you can implement — one using a Microsoft List and another using a Security or Distribution Group.
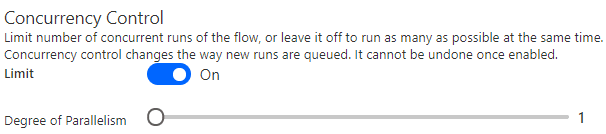
Important: For both solutions, you must limit Concurrency Control and set Parallelism to 1 concurrent flow run. This ensures flows run in serial order and assign users in strict chronological sequence.
Round Robin via a Microsoft List
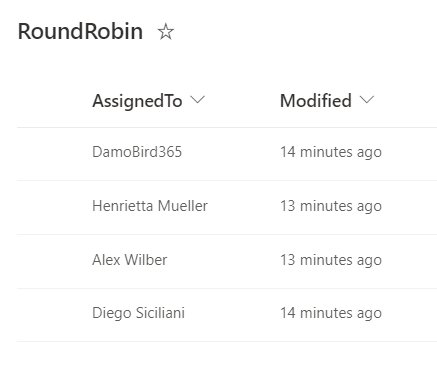
The setup of the list is quick and easy. Create a default Microsoft list and simply add a Column called AssignedTo and choose the “Person or Group” Type. Then configure the view to include the Modified column. This list is used purely as a source of the array/list of users and manages who is up next. This is potentially the best method for emailing or assigning planner tasks. If you were assigning list items to these users, you would need another list.
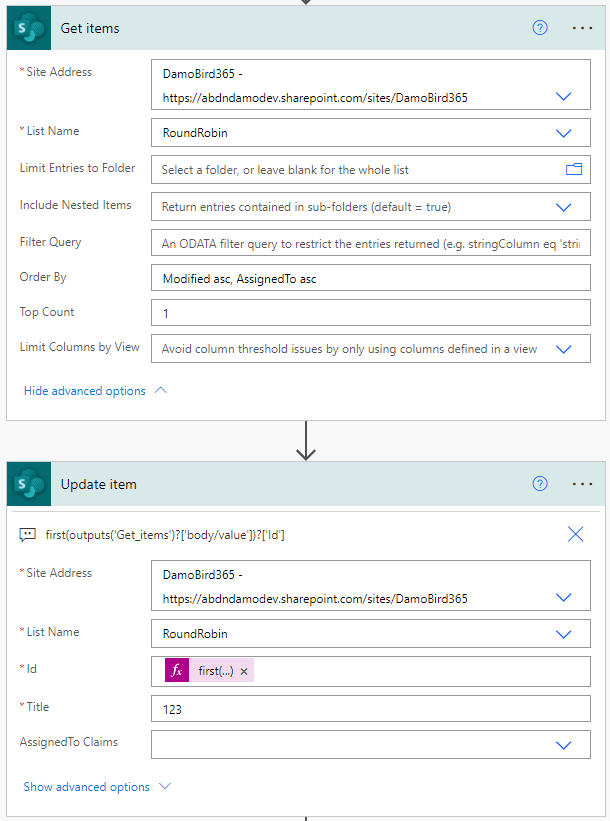
Once you have triggered your flow, we require two actions to implement the round-robin. The first is Get Items and we use this to get the last user or item to have been updated based on the modified date (in ascending order) of the item. We use the Top Count feature to return 1 item. We can also (optionally) sort by AssignedTo, if we want the round-robin to run in alphabetical order rather than the order at which the user appears in the list. Again we use the ascending feature of Order By in the advanced options of the Flow Action.
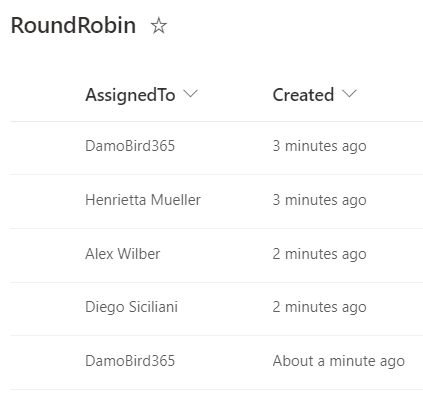
The second action is Update Item, and it is here that we update the item (simply a fixed value for the default list Title) to ensure that the modified date is now the most recent, returning this user to the bottom of the list when ordered by ascending above. I use an expression first(outputs(‘Get_items’)?[‘body/value’])?[‘Id’] to get the first and only Id returned by the get items action in order to update this item by Id.
We can use any of the dynamic values returned to us by the Update Item action, including the Display Name or Email and this negates the need to use first on the Get Items action values.
Round Robin via a Group (Security/Distribution or Teams)
As well as showing you how to use a group for the source of the users (check out my article on using Security/Distribution Groups in Power Automate), we will be using this list to track who from that group should be assigned next. This method is best when you want to assign multiple list items via Round-Robin and is most likely triggered when an item is created or possibly when a new Response is submitted to a Microsoft Form.
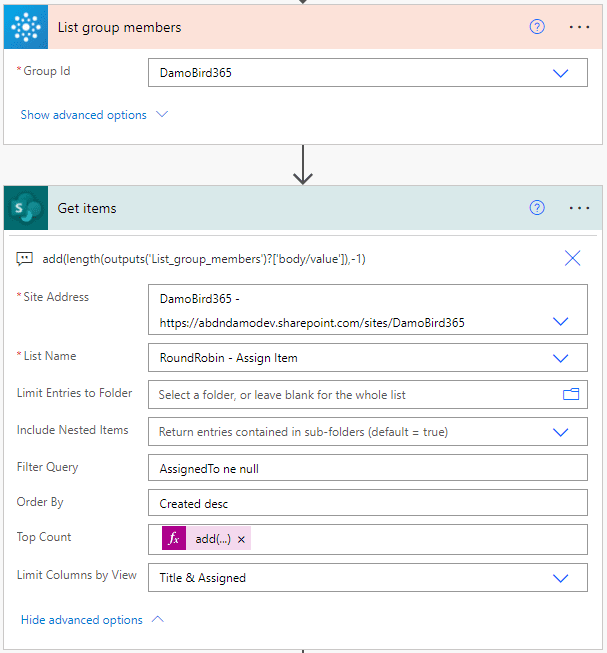
The idea here is that we will use Get Items to return all but 1 of the group of users and then filter that group of users against our security/distribution group to see who is not there. By cleverly using Order By, filter where the Assigned to is not Null (to prevent including records that are yet to be assigned) and descending based on the created date/time, we can ensure that we check the last N-1 items created, see below. Note that we use the expression add(length(outputs(‘List_group_members’)?[‘body/value’]),-1) to return the last N-1 items based on the length of our group.
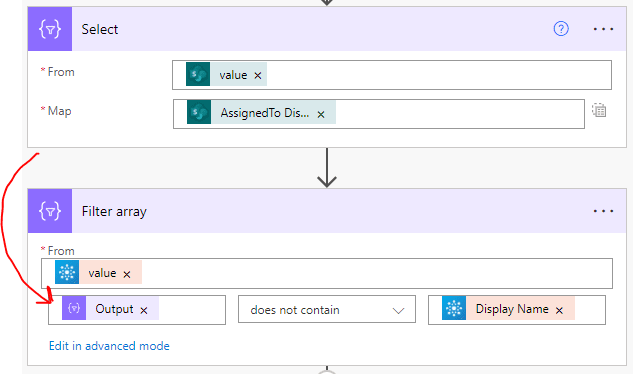
Next, in order to get the -1 user whose turn is up next, we must get an array of display names using Select and filtering our value array from the List Group Members where the select array does not contain the Display Name.
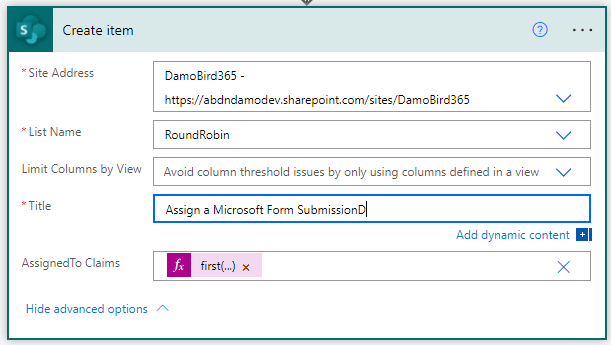
We can then either Update the Item (in the case of a trigger when an item is created) or create an item, if the flow is triggered from something else, like a Microsoft Form Response, where you want to assign the submission to the next user. The expression used to get the next user from the result of the filter array is first(body(‘Filter_array’))?[‘DisplayName’].
Note - If you are creating an item as the last step, filter on the created date, if you are updating an item as the last step, filter on the modified date.
Please let me know how you have used this in the comments below. If you are implementing a helpdesk/ticketing system, you might also want to assign a unique reference, in which case check out this useful article.