Need a quick way to let people register for your events and automatically send them a calendar invite? In this post, I’ll show you how to combine Microsoft Forms with Power Automate and Outlook to build a simple attendee registration system — no premium connectors required.
Update Sept 2022 - looking to automatically disable your form or maybe trying to prevent attendees from receiving duplicate emails and anonomise attendees? Check out those links and see how it is done.
The Microsoft Form
When configuring your form, make sure that all of your answers for the event names are unique. You will learn why this is important later on when building the flow. If you must have two events with a similar name, maybe consider using a prefix for an Event ID. I made the mistake whilst building this proof of concept and have two events called PowerAutomate which will make finding this event in Outlook a lot more complicated.
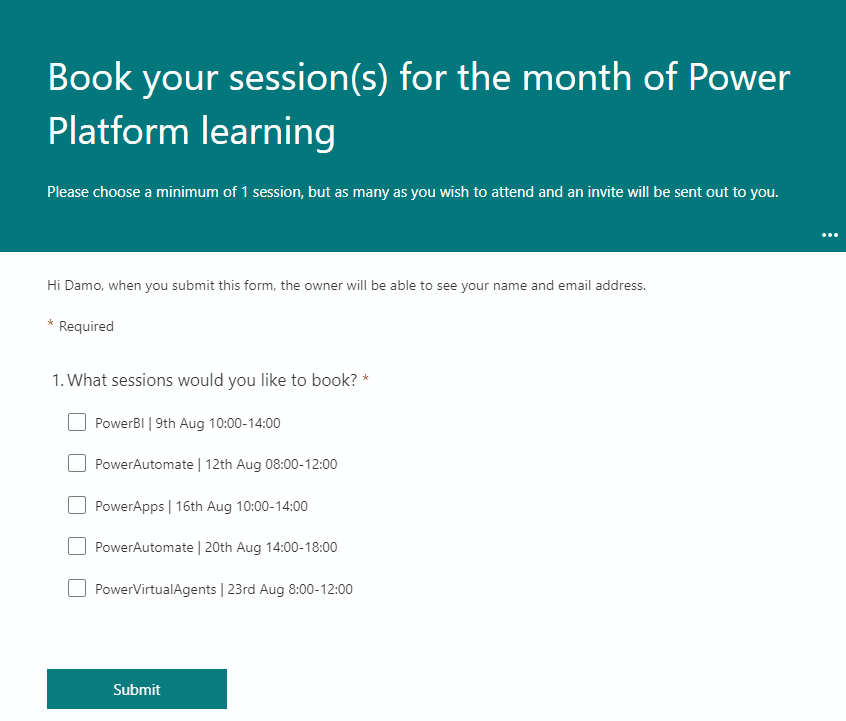
Attendees are encouraged to select the event(s) that they wish to attend. My example above is an internal form and I will rely on the email address of the logged-on user. Equally this form could be made public and the user requested to supply a valid email address via one of the questions, in order for the invite to be sent.
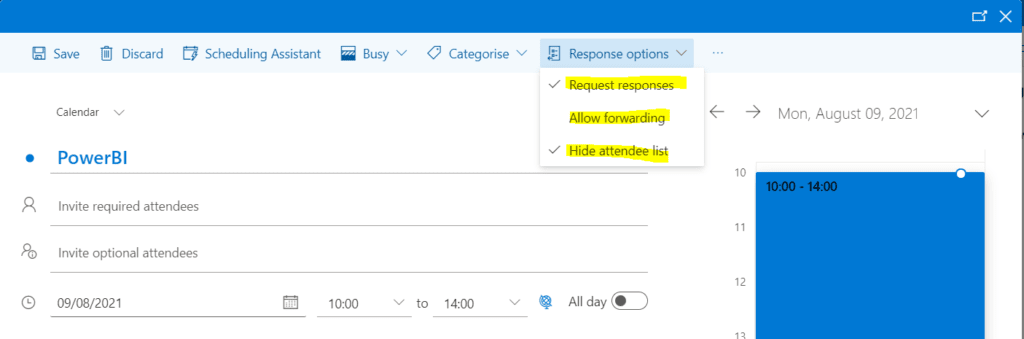
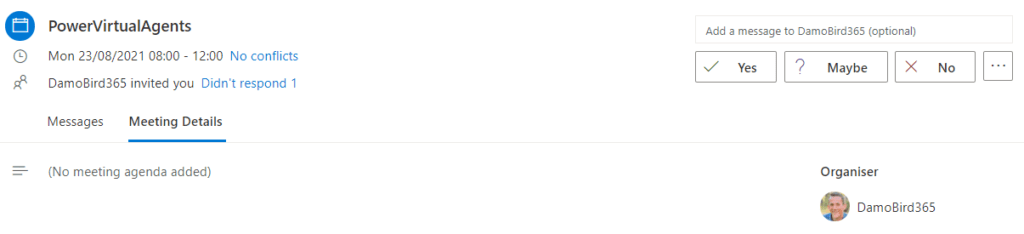
The Events in Outlook
It’s imperative that you ensure that the event(s) cannot be forwarded. You may wish to request a response and in order to ensure attendees are anonymous, you might want to hide the attendee list. This is all configured via the response options of the event in Outlook. Just like the form answers, it’s also a good idea to make all of your calendar subjects unique so that they match your answers on the Microsoft Form. You might want to check out the Just for Info select action below before setting up your events in Outlook.
The Flow
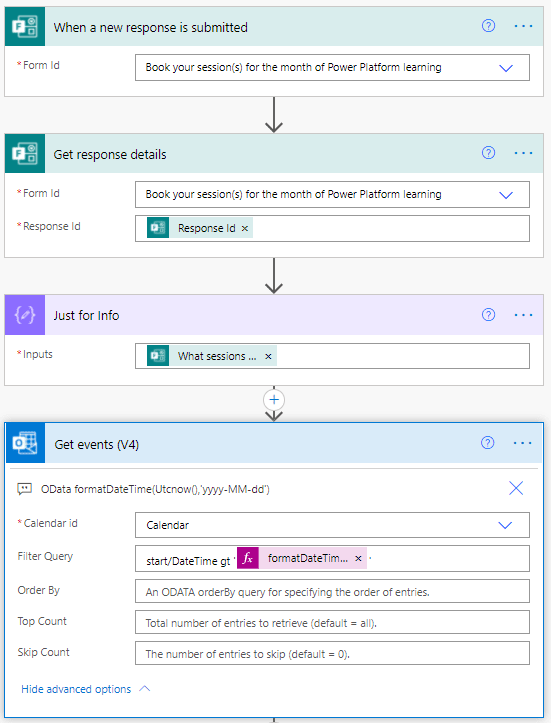
The initial stages of the flow are not unfamiliar - when a new response is submitted and get the response details. Please ensure that concurrency is turned OFF on the trigger as you do not want this flow running concurrently as you will be overwriting (and not adding) the attendees each time it runs.
I have included a compose to display the answers as an array. You might want to read this article in order to understand how you can access multiple choice answers from a form. This compose action is very useful for establishing your events in outlook and seeing how the form responses are returned to Power Automate.
Then finally I get events from the calendar (and you may want to include an OData Filter). You can limit the events after today’s date using: start/DateTime gt ‘formatDateTime(Utcnow(),‘yyyy-MM-dd’)’
The next stage of the flow is to loop through all of the selected events. In order to do this, you must convert the form response to JSON so that it is accessible as an Array. Then we can use filter array, using the value from get events where the current item (i.e. the form response) contains the event subject. This is why it is important to have the event subject and form answer unique and potentially even as identical pairs. Otherwise, you need to somehow match them using an array and a filter or via a switch. I have an article on simplifying complex conditions using arrays here if you really want to go that way.
You will also see that I have included a get event, even when I should have the event details from the earlier get events action. During testing of the update event action, I discovered that the teams meeting invite was being lost. The get events action doesn’t return the event body, get event does. You need to consider updating the whole event with all parameters in order to keep it current. Please see the forum post here.
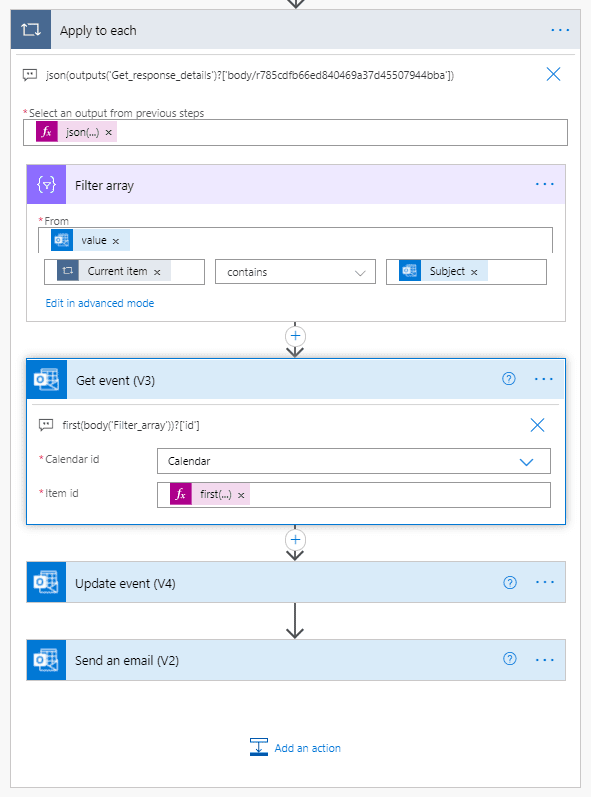
The get event action is simply returning the first result of the filter array. This is to avoid unnecessary loops and is based on unique event subjects. You will always see my expressions in the comments of an action.
Updating the Event
Using the first event ID, we are then able to use the dynamic content from the get event action to populate both the required fields and the optional advanced options (which aren’t actually optional if you have configured them on outlook). You need to ensure that you include any of the parameters like Body, Location, Reminder, Is Reminder On or Response requested. If you fail to set these, they will be overwritten with the default option and may give you unexpected results despite you setting up your original event in a particular way.
When it comes to required attendees, remember that you are appending to the list. You must therefore include both the new attendee’s email from your Microsoft Form, but also the existing Required Attendees based on the get event action. This is why this flow must not trigger concurrently as two simultaneous submissions may result in an email being overwritten and lost. Separate your email with a semi-colon.
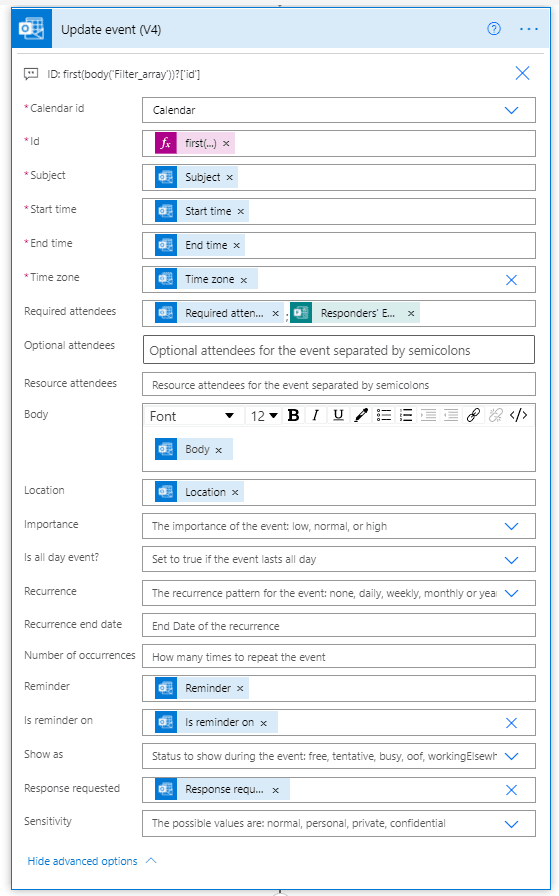
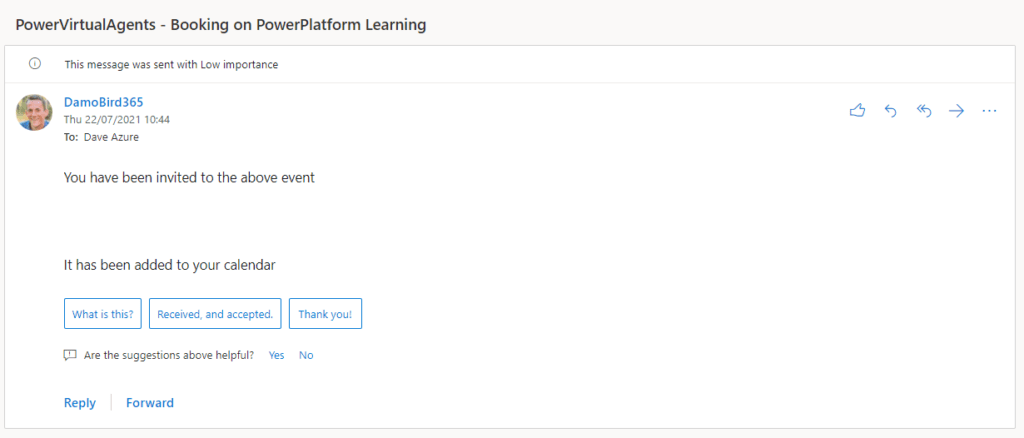
If you want to send your attendee an email, you have two options. By enabling the response requested to yes, they will automatically get an email. If you have asked for confirmation, the email will also give them the familiar yes, no, maybe response form.
Alternatively, using a separate action, you can send a confirmation email using any of the dynamic content from the various actions previously used.
Next Steps
This is very much a proof of concept but I look forward to hearing your feedback. In order to manage attendees, a PowerApps could be utilized to update a running total of available spaces. Rather than adding attendees on the fly, a PowerApp solution could include a flow that builds the event and adds all attendees once registration has closed. Something that I may explore in the future.